Wednesday, July 31, 2013

Why we eat the free life

Many of you might be wondering why we've decided to to cut so many types of food out of our diet.  The reason being:  Eczema.  More specifically, atopic dermatitis.

My daughter has struggled with this her whole life.  I believe we can see signs as far back as her being a month old.  She suffered from fairly severe colic as a baby and also had baby acne.  Most people who I have talked to who also have children suffering from eczema have had similar experiences.  At the age of 1 we had her allergy tested.  The results - negative.  At 1.5 years old we were back at the doctor again for her itching.  She hadn't developed all of the skin patches yet, but itched like crazy.  We were sent to a dermatologist then, who suggested we had scabies.  I remember thinking - really, scabies?!?!  If that would have been the case my husband and I would also have had it.  Plus we keep a clean house.

Around age 2 she started to develop the skin outbreaks.  We also started using steroid creams and she took a LOT of rounds of antibiotics.  At 2.5 years old things got really bad.  We had a lot of change in our life right then - moving, me staying home, leaving daycare, etc., and her skin was the worst I have ever seen it.  Her whole back was broken out, her ankles bloody and she we couldn't sleep at night because of the constant itching.  We would put socks on her before bed so she wouldn't scratch her ankles, but they would be bloody in the morning.  We would have to wet them before pulling them off.  Basically - we were all miserable.  Before moving we had tried some chiropractic care and decided to continue that here.  The chiropractor suggested a gluten and dairy free diet, but I wasn't 100% convinced yet.  We also saw an allergist over here who ran tests on her and found allergies for mold and possibly eggs.  Again, removing just the egg from her diet didn't make a difference.  At the recommendation of our pediatrician we were sent to a dermatologist.  I was hopeful he would have some suggestions.  By this time we had tried EVERYTHING!  Oatmeal baths, every kind of lotion imaginable, bleach baths, bathing every day, bathing every other day, lotion twice a day, lotion not at all, multiple steroid creams, different types of clothing, etc.  I was beginning to feel like I was running in circles.  He finally prescribed an oral steroid and lots of antihistamines to give her body the break it needed to heal itself.  We had been on antihistamines already, but he increased the dosage.

After that trip to the dermatologist, things got better, but I felt as though we were just controlling the situation, not fixing it. I also didn't like the fact that she was taking SO MUCH medicine.  With all that in mind, we headed to Allergy Associate of LaCrosse.  After a long drive, more testing, blood draws and tears, we discovered the root of our problem.  Mold, Dust Mites, Eggs, Dairy, Gluten, Peas, Corn and Nuts.  This was determined through testing and I could see the results.  I was much more convinced this was causing the issues.  Eliminate all those from your diet I was told and dust and vacuum more to get rid of the dust mites.  We were also given antigen drops.  These are suppose to help her immune system become more tolerant to the food and environmental allergens she is allergic too.  So far, I think they are helping.  We also have a daily skin routine that seems to be working.  I'll post that another time!  We go back in September for another check up!

And that's how EatingTheFreeLife was born.  I decided if I was having trouble coming up with recipes we could eat - others might be too.  Plus all of the recipes I found had lots of strange ingredients in them.  I just want to eat normal food that tastes good and doesn't make anyone itchy!  So far - so good! 

Tuesday, July 30, 2013

Dairy, Gluten, Corn and Pea Free Hamburger Tater Tot Casserole

Hello!

What a weekend!  My Friday started unusually early because Jim got a case of the stomach flu.  Luckily no one else in the house caught it - but my goodness that wasn't pleasant.  Needless to say we deep cleaned the house to kill all of the germs.  The babies and I escaped to gymnastics class Friday morning.  Saturday was spent doing things around the home.  Because of the stomach flu our original plans of watching my good friends little girl were canceled.  Baby boy was looking forward to hanging out with his friend too!  Sunday we had a family reunion of sorts at my moms house.  It was so nice to see my aunts and uncles that don't live near us.  I think if we all lived closer to each other we would have a lot of fun together more often!  I really enjoyed visiting with them, showing off the babies, and seeing what was new in their lives.

Today I am trying a Pilates class at a gym near our home.  A neighbor invited me to go and I'm looking forward to it.  Lets hope my post-baby abs get a good workout!

Since I'll be gone for dinner I whipped up hamburger tater-tot casserole for the family.  This was a favorite around the house and I decided to put a 'free' spin on it.  The dairy-free cream soup mixture could be used in other recipes too!


To start, make your dairy free cream of mushroom soup. 


Bring 2.5 cups of chicken broth and a half cup of soy milk to a boil on the stove.


While it is doing its thing, prepare your mushrooms.  Instead of using fresh mushrooms, I used canned.  Feel free to do what you like ; ) Chop them up into tiny pieces and away you go!

While you are waiting for the chicken broth and milk mixture to boil, mix together 1 cup of milk, 3/4 cup rice flour (or whatever flour you have on hand) and the spices (salt, pepper, garlic powder and onion powder).  The original recipe I found for this soup calls for a lot more spices than what I put in.  I've found that mixture of spices would be delicious for eating the soup by itself but not when mixed into a casserole.  The mixture will be thick.


After the chicken broth and milk has boiled on the stove, whisk in the flour mixture.  Reduce your heat to low, stirring constantly until the mixture thickens up.  This only took a few minutes!


Add your mushrooms and your soup is done!


Now to assemble the casserole.

Brown 1lb of hamburger on the stove top

While this is browning begin to assemble your casserole.  I added about half of the tater tot bag to my greased casserole dish.


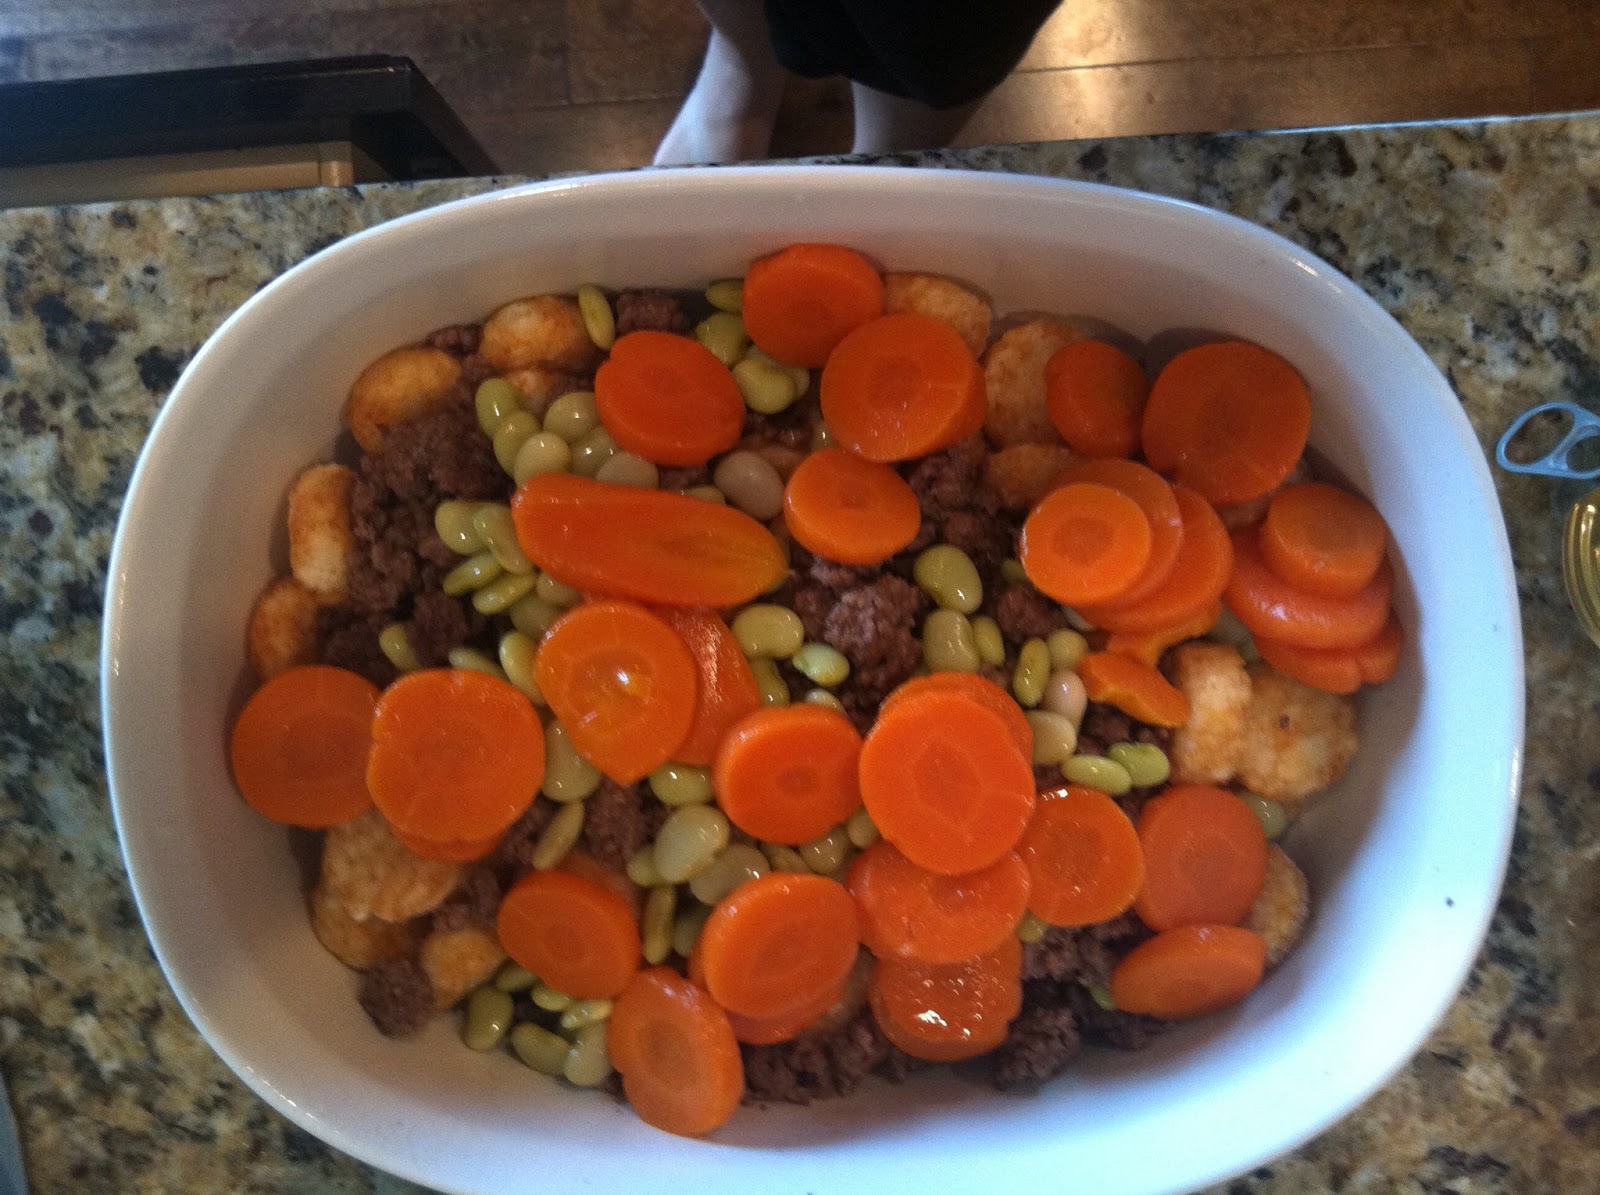
Then add in half of your browned hamburger, half of a can of carrots and half a can of lima beans.  Usually I would use a can of mixed vegetables, but since we can't have peas or corn, that is out.  The carrots and beans add a nice texture to the casserole.


Then layer on half of the cream of mushroom soup.  This makes it extra creamy delicious!

Then repeat!

Bake for 30-45 minutes at 350 degrees and enjoy.  I was surprised at how great this tasted.  I couldn't tell a difference between this version and the 'normal' recipe.  We will be making this again! 


Dairy Free Cream of Mushroom Soup
modified from:  www.mywisemom.com
Makes ~ 4 cups or 2 cans of soup

2 1/2 cups chicken broth
1 1/2 cups soy milk
3/4 cup rice flour
Salt
Pepper
1/4 tsp garlic powder
1/4 tsp onion powder
1 can mushrooms, chopped

1.  Combine chicken broth and 1/2 cup of soy milk in a saucepan.  Bring to a boil.
2.  Whisk together remaining milk, flour and spices in a medium bowl.
3.  Pour the flour mixture into the boiling chicken broth mixture.  Whisk constantly.
4.  Reduce heat to low and continue whisking until mixture thickens (approx. 2-5 minutes)
5.  Add chopped mushrooms.

Hamburger Tater Tot Casserole
1 lb hamburger
1 package tater tots
1 can of carrots
1 can of lima beans
4 cups dairy free cream of mushroom soup
Splash of extra soy milk (if needed)

1. Preheat oven to 350 
2.  Brown hamburger in a large pan on the stove
3.  Grease the bottom of a casserole dish
4.  Create a layer of half the  tater tots, hamburger, carrots and lima beans.
5.  Pour half of the cream of mushroom soup over layer one
6.  Use the remaining tater tots, carrots and lima beans to create the last layer
7.  Top with cream of mushroom soup.
8.  Gently mix.  If necessary add a splash of milk to make extra juicy.
9.  Bake at 350 degrees for 30-45 minutes or until casserole is bubbling.


Monday, July 22, 2013

Banana Chocolate Ice Cream

Happy Monday and Royal Baby Birthday!

I've been a royal family fan for as long as I can remember.  It was clearly known by many of my friends that I was destined to be a princess.  While I didn't become a member of the royal family (although he did marry a girl named Kate who also has brown hair and is about my same age - coinsidence I think not) we decided to celebrate the impending baby birth with some ice cream!


I've seen this recipe floating around Pinterest for a long time.  We've made it once before but use real milk, real chocolate chips and peanut butter.  Now that those are no-no's in this house, I put a vegan, no nut, gluten free spin on it.  The results - AMAZING!  Chocolate delicious meets ice cream that won't hurt my stomach!  I like my ice cream thick and somewhat chunky.  You could modify this to make it however you like.  Whatever you decide to do - make it!  You won't be disappointed!


To start break out the blender.  I sent a text to the husband to make sure he was ok with me using the Vitamix.  I know that sounds silly - but it's like his third child.  Since I got the go ahead, we started to make it!

I had froze some bananas that were about to go bad and used those.  I would recommend using frozen bananas over fresh.  Next time you have some rip bananas, just peel them and pop um in the freezer so you can make this bowl of yumminess!


I put two bananas, a cup of ice, two big handfuls of chocolate chips into the blender and let it whip up.


After the initial blend I added just enough milk to make it thin enough to blend the rest of the bananas and ice (about a 1/4 of a cup).  This is where you can add more or less milk depending on how thick you like your ice cream.  Peanut butter would also be amazing in this!


Then scoop into bowls and enjoy this healthy, satisfying, delightful treat!


Banana Chocolate Ice Cream

2 frozen bananas
1 cup ice
1/4 cup soy milk
2 big handfuls of vegan chocolate chips

1.  Place bananas, ice and chocolate chips in blender.  Blend until somewhat smooth
2.  Add soy milk
3.  Blend
4.  Pour into bowls and enjoy!

Happy royal watching!  You can find me at home today.  We do need to head to the grocery store, so hopefully I don't miss the big event!


Sunday, July 21, 2013

Fake Out Alfredo Rice and Veggies

I hope you all had a wonderful weekend.  Ours was filled with relaxing time, picking up an on sale patio set at Home Depot and a neighborhood block party.


We also enjoyed Alfredo Rice and Veggies.  Now I know you are thinking - say what?!? you can't have alfredo sauce if you are dairy free.  Oh yes, yes you can.  The secret is to use cauliflower to make the sauce.  It turned out delicious!  Smooth and creamy, you'd hardly know this wasn't the stuff from the can.  I would definitely make this sauce again and use it over noodles - or just eat it alone!


To start I made 2 cups of minute brown rice according to the directions on the box.  While the rice was doin' it's thing, I started on the cauliflower sauce.  For the sauce I brought 4 cups of vegetable broth to a boil and added one head of cut up cauliflower.  I let that boil together for 10 minutes until the cauliflower was nice and soft.


Here's where I had a little snap-fu.  I had my food processor all set up to blend the cauliflower but when I pressed start - it wouldn't work.  After asking Jim to help fix it, neither one of us could, so we switched to the Vitamix blender and will have to search for a new food processor.  I'm pretty sure that Viti and my husband have a special relationship.  Best blender hands down though.  While they are expensive, it's never broken on us, survived 3 moves, and heated up soup with it's powerful motor.  Almost as powerful as some small lawn mowers I think.  Crazy!


Anyway .... put your cooked cauliflower (not the juice) into something that blends and puree it up!  You can add extra vegetable broth (or milk) if it needs some more juice.  While this is yummy - we are going to make it even better!

In a large sauce pan melt 2 tbsp vegan butter.  Then add 2-3 gloves chopped garlic.  Let the garlic get nice and flavorful (about 3-5 minutes).  Then add the rice and sauce.


To incorporate some veggies I know my daughter needs, I steamed some carrots and broccoli and stirred those into the rice and sauce mixture.  Season with salt and pepper and you are set!


I think you can tell by the remnants on her plate - this was a success!


Have a great week!

Fake Out Alfredo Rice and Veggies
modified from:  www.pinchofyum.com


1 head cauliflower chopped into pieces
4 cups veggie broth
2 cups brown rice
2 tablespoons butter
2-3 cloves chopped garlic
1/2 bag frozen broccoli
~10 baby carrots diced

1.  Make rice according to package directions.
2.  Bring vegetable broth to a boil.
3.  Chop cauliflower and add to boiling vegetable broth.  Let simmer for 10 minutes.
4.  Transfer cauliflower to blender and mix until smooth.
5.  Melt butter in large saucepan and saute garlic for 3-5 minutes.
6.  Steam broccoli and carrots in the microwave following package directions.
7.  To butter mixture, add rice, cauliflower sauce and steamed vegetables.


Enjoy!

Saturday, July 20, 2013

BBQ Chicken with Apple Slaw

Happy Saturday!  I hope you are enjoying your week.  We've been busy as usual.  Monday was our playdate with new friends and it went very well.  All of the girls enjoyed playing together, painting and talking about princesses.  What more do you need when you are 3 right?!  We also visited the library this week and took in our first movie in the theater.  One theater is town was showing Happy Feet (a favorite around this house) so we decided to check it out.  Everyone did great!  I was a little disappointed we couldn't get any popcorn, but Lauren liked her Enjoy Life Brownie Bites that I smuggled in!  Thursday we had a play date with our friends from Monday and went to the science center.  Yesterday was a really fun day!  My parents were in town and we were able to visit the zoo after gymnastics.  Everyone had a great time and Grandma and her girl got to feed the giraffes together!  Grandma even got some snuggle time before bed, which is a rarity.  You've got to soak it in when she's giving it out! 


For supper this week we tried a recipe from www.iowagirleats.com.  If you haven't checked out that blog yet - it's fantastic!  Lots of great recipes that I modify to meet our allergy needs!  Tonight we tried Crock Pot Bourbon Chicken Sammies with Apple Slaw - minus the Bourbon, buns, soy sauce and cheese!

I started by putting all of the ingredients for the bbq sauce in the crock pot.  The original recipe calls for bourbon, but we didn't have any on hand.  Whiskey, wine and margarita mix yes - bourbon no.  After the bbq sauce was all mixed up, I cut up 1 pound of chicken breast into 4 chunks and put it into the crock pot for a few hours until it was done.  I also left out the soy sauce.  Apparently soy sauce is made with wheat, so it was a no no for us!  Then I turned the crock pot on 'keep warm' and let it sit until dinner time.

When it was time to make dinner, I took the chicken out and shredded it up with two forks.  I also took most of the sauce and put it in a pan on the stove.  I let it boil, turned it down, and let it thicken up.  This makes for a great dipping sauce!

While all that was happening I made the DELICIOUS apple slaw.  I whisked together the honey, apple cider vinegar, lime juice and extra virgin olive oil.  Then I added one cut up green apple and coleslaw.  I cheated and used pre-packaged coleslaw from the store.  Way easier than shredding my own cabbage.

We skipped the recommended gouda cheese and buns - but that would have been great too.  The hubby kept everything separate on this plate while I piled the slaw on top of the chicken.  The tangy slaw and bbq sauce on the chicken mixed so well together!  I would even make the slaw by itself and eat it as a side dish I liked it so much.  The apples added such a nice crispiness to it.  It was even kid approved!  She liked it so much she asked for seconds!  If that's not the mark of a good meal, I don't know what is!


Crock Pot Chicken and Apple Slaw
Modified just a little bit from www.iowagirleats.com

BBQ SAUCE
1 cup ketchup
3 tablespoons brown sugar
3 tablespoons molasses
3 tablespoons apple cider vinegar
2 tablespoons Worcestershire sauce
1 tablespoon dijon mustard
1 teaspoon garlic powder
1 teaspoon onion powder
Dash of crushed red pepper
Salt and pepper
1 pound chicken breast

SLAW
3 cups coleslaw
1 green apple chopped up
2 tablespoons extra virgin olive oil
2 tablespoons apple cider vinegar
1 tablespoon honey
Juice of 1 lime


Salt and pepper

1.  Mix all of the BBQ sauce ingredients together in the bottom of the crock pot.
2.  Add chicken
3.  Cook on high until chicken is done ~ 4 hours
4.  When the chicken is done, pull it out of the sauce and shred using two forks
5.  Take ~ 2 cups of the sauce out of the crock pot and heat to a boil on the stove.  Turn the heat down and allow it to thicken.
6.  Next mix up the slaw.  Whisk together the extra virgin olive oil, apple cider vinegar, honey, lime juice, salt and pepper together.  Then add the slaw and apple.  Mix it up!
7.  Serve all stacked together or separately with the bbq sauce for dipping.

How ever you decide to eat it - it's amazing!

Link back to original recipe:  http://iowagirleats.com/2013/07/09/crock-pot-bourbon-chicken-sammies-with-crunchy-apple-slaw/