Monday, December 9, 2013

Beef Stew with Homemade Cranberry Sauce

Brrrrrr it's cold here!  The temperatures have dropped lately and we have a new blanket of fresh snow on the ground.  We enjoyed spending some time outside yesterday making 'paw prints' and snow angels in the snow.  Not a bad way to spend a Sunday!


My parents recently came down for a visit.  After a day filled with Christmas shopping we headed home and had homemade beef stew and cranberry sauce.  It was a hit!  The was actually the second time I've made this dish in the last week.  It was adult and baby approved!


The one thing I really like about this dish is that it is customizable.  Don't like mushroom - don't add um!  Not a fan of green beans - take um out!  Love love love carrots - add more!

To get started, brown your stew meat.  We cheated and purchased pre-cut stew meat from the grocery store.  You could cut up your own bottom round roast if you wanted too.  I used about 1.5 pounds.


 Once the meat has browned, add your beef broth, veggies and spices.  Let it simmer for about an hour.


While the meat is working chop up your potatoes.  After the meat has simmered for about an hour, add your potatoes and let it continue to work for another 20 minutes.

That's it!  It really couldn't be easier or more delicious!

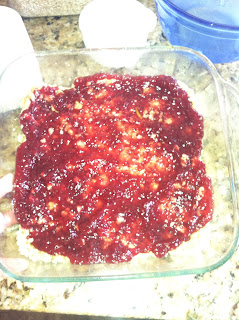
We made a homemade cranberry sauce to go with it and let me tell you, I don't think I'll be buying from the can again.  This was SO EASY and SO YUMMY!  I dipped my meat in the cranberry sauce and it was fantastic!


 To make the sauce, put one container of cranberries in a pot, along with 1/2 cup sugar, zest of one orange and juice of one orange.  Let it simmer for about 15 minutes or until the cranberries pop and are soft.  So amazing!

Beef Stew
Recipe from Allergy Free Recipes Book

Free of:  Dairy, Wheat, Corn, Peas, Eggs and Nuts!

2 tablespoons olive oil
1.5 pounds stew meat cut into pieces
1 tsp caraway seeds
1/2 tsp salt
1/2 tsp pepper
1/2 tsp dried thyme
28 ounces beef broth (about 2 cans) Make sure this is gluten free!  Some kinds are not.
1 can sliced mushrooms
1/2 cup chopped carrots
1 red bell pepper chopped
10 green beans chopped
3-4 medium sized potatoes, peeled and chopped

1.  Heat oil in a large saucepan.  Add beef and cook until the meat begins to caramelize and the juices evaporate.  

2.  Add caraway seeds, salt, pepper and thyme.

3.  Add beef broth and stir to scrap up the brown bits off the bottom of the pan.

4.  Add mushrooms, carrots, pepper and green beans.  Cover, reduce heat to low and let simmer 1 hour.

5.  Add potatoes and bring back to a boil.  Reduce heat to low, cover and simmer 20 minutes.

6.  Serve and enjoy!

Cranberry Orange Sauce 
Recipe modified from the Food Network

Free Of:  Wheat, dairy, eggs, nuts, corn and peas!

1 package cranberries (about 12 ounces)
1/2 cup sugar
Zest of one orange
Juice of one orange

1.  Put all ingredients together in a medium sized sauce pan.

2.  Simmer over medium heat 15-20 minutes or until the cranberries burst and the sauce thickens.

3.  Serve warm or cold!


Monday, October 28, 2013

Apple Squash Soup

Happy Monday.  


Allergies have been really bad lately, causing us to have a big eczema outbreak.  So much so that we have had to scale back our allergy drops in order for her to heal.  Slowly we are getting back to normal.  Her face seems to have some of the worst spots.  Anyone use any good treatments on the face?  We have been prescribed EpiCeram cream, and so far that seems to be helping.  I'm ready for lots of hard frosts so the mold and outside allergies go away for a bit.  She seemed to think rubbing mommy's lip gloss all over face would help.  Maybe that's the trick!


We have also had a case of the sickness at our house lately.  The littlest one got his very first ear infection last week.  I'm surprise he's lasted this long without one.  Our little lady had a sinus infection and the hubs and I have both had sore throats.  Sickness be gone!


To help make us feel better we made Apple Squash Soup.  


I was a little nervous to make this since the last time I tried a squash soup it took FOREVER to make.  Peel, chop, blend, mix, boil, repeat, oh it was too much.  This recipe is still a little bit of work, but the taste is totally worth it.  One of the parts I never liked (cutting up the squash) was made so much easier by roasting it first.  The squash was so easy to scoop out and I only had to make one cut down the middle.  I had never heard of adding apples to your squash soup until I ran across this recipe.  The apples give a nice sweet flavor to this dish.  Since I wasn't sure how it was going to turn out, I didn't take any pictures during the process - but we will be making this one again!

APPLE SQUASH SOUP
 made allergy friendly from:  www.chow.com

Free of:  wheat, dairy, peas, corn, nuts, milk and eggs

1 large butternut squash cut in half and seeds removed
2 tablespoons vegan butter divided
1 medium apple
1/2 medium onion
1 1/4 cups chicken broth
1 1/4 cups water
1/6 cup soy milk
Salt and pepper

1.  Preheat oven to 425 degrees.

2.  Cut your squash in half the long way and scoop out all of the seeds.  Then place cut-side up on a foil lined baking sheet.

3.  Melt 1 tbsp vegan butter and spread all over the squash. Season with salt and pepper and roast for 50 minutes.

4.  Next, dice up one medium apple and place in a medium saucepan.  I used a Honeycrisp apple, but any flavor would work. Dice half of an onion and add to saucepan.  Add remaining (1 tbsp) melted vegan butter to the pan and cook for about 7 minutes, or until the apples are getting soft.

5.  When the squash is ready to handle, scoop out all of the flesh and place in the saucepan with the apples, onion and butter.

6.  Add broth and water and bring mixture to a boil.  Then reduce heat and let simmer for 15 minutes, stirring occasionally.

7.  Stir in soy milk (half and half, cream, regular milk, etc. would all work in this recipe).

8.  Using a blender, and in batches, puree the squash mixture until smooth.  I did this in 3 batches.

9.  Serve and enjoy!

Sunday, September 29, 2013

Vegan / Gluten Free Banana Chocolate Chip Cupcakes

When we first received the letter from our allergist stating our little lady couldn't eat eggs, dairy, wheat, corn, peas or nuts I surprisingly wasn't worried about our normal meals.  The big thing I wondered about were desserts.  Surprising right?!  How would she ever get to eat a cookie or cake again?  What would we do about birthday celebrations at preschool? What about Christmas cookies? 

I enjoy baking, but this new twist has been quite the challenge.  All new types of flours, egg substitutes and vegan butters were a little mind blowing.  I've tried all sorts of recipes and they are just not the same as the original.  Until now.  These cupcakes are amazing!  So amazing in fact that my daughter asked for another the minute after she ate the first one and my husband, who is notoriously picky about his desserts, (he's a bit of a dessert connoisseur) approved and ate more than half of them!

This recipe is just to fantastic not to share!  I do believe you could make these using 'regular' ingredients and they would be just as amazing!


I adapted a recipe I found online and did some quick Internet research to figure out a good substitute for eggs.  Turns out that in different types of recipes you need to use different substitutes for eggs.  Who knew!  For cupcakes, I used 1/4 cup vegetable oil per egg.


To start these bad boys mix together your dry ingredients.


Then make a well in the middle of your dry ingredients and add in your butter, mashed bananas, vegetable oil and vanilla.  Stir the wet ingredients together first and then start to stir in the dry ones.  Stir until everything is mixed up.  Then add in your chocolate chips!


Scoop the batter into a paper lined muffin tin.  This made 12 cupcakes for me.  Then mix up the frosting.  It's your basic powdered sugar / butter / milk recipe.  Bake the cupcake for 25-30 minutes at 350 degrees.  When finished and cool and frost them!  Having a little help never hurt anything ; )

We added sprinkles to make them fancy and then devoured 'um.


Hope you enjoy them too!

Vegan / Gluten Free Banana Chocolate Chip Cupcakes
adapted from:  www.mywisemom.com

Cupcake Ingredients
Dry Ingredients
*1 1/2 cups gluten free flour.  I used Bobs Red Mill gluten free flour
*1 1/8 tsp xanthan gum (Only use this if you are using the Bob's Red Mill flour.  The side of the flour package tells you how much to add based on what type of food you are making.  For cupcakes it is 3/4 tsp per cup of flour.  So for this recipe I added 1 and 1/8 tsp.  You would NOT add this if using wheat flour.)
*1 tsp baking powder
*1/2 tsp baking soda
*1/4 tsp salt

Wet Ingredients
*1/2 tsp vanilla
*1/2 cup vegan butter.  I used Earth Balance baking sticks.  Any type of butter would work.
*1 1/2 cups mashed up bananas.  (I used 3 bananas)
*1/2 cup vegetable oil (This is a substitute for eggs.  If you can eat eggs, use 2 of them!)

*3/4 cup vegan chocolate chips (regular would work too)

Frosting Ingredients
*1 tsp vanilla
*2 tbsp soy milk (use whatever milk is allergy friendly in your house)
*1/2 cup vegan butter.  I used Earth Balance again - but use whatever is friendly to you!
*3 1/2 cups powdered sugar


1.  Preheat oven to 350 degrees.
2.  Line your muffin tin with paper liners.
3.  Mix together dry ingredients
4.  Make a small well in the center of your dry ingredients.  Add the wet ingredients.  Stir the wet ingredients together first, then begin to combine with the dry ingredients.  Stir until mixed.
5.  Stir in chocolate chips
6.  Scoop batter into cupcake papers.
7.  Bake for 25-30 minutes, or until a knife inserted comes out clean.
8.  While you are baking the cupcakes, mix up your frosting.  Beat all of the ingredients together in a mixer until frosting forms.  Add more milk or powdered sugar depending on how runny or thick you like your frosting.
9.  Allow cupcakes to cool on a wire rack, then frost, add sprinkles and enjoy!


Wednesday, September 4, 2013

Steak Stir Fry!

Sorry I've been an absent blogger lately.  Seems like life has gotten busy busy busy! We've been doing things like this:

 Trying on a new hat!

Heading to our first day of dance class!

 Sleeping, sleeping, sleeping

Feeding goats at the zoo

Cheering on the Hawkeyes

 Having our first day of preschool!

My babies and I

And indulging in some comfort food after our baby went off to preschool!


We did try a new stir fry meal though!

This quick, fast and delicious meal took no time to make at all!  Especially since we used steak left over from the night before.  I forgot to take pictures while making it, so I'll summarize quickly!

1.  Make rice.  I used minute brown rice, but whatever you have on hand would be great.  I used 2 cups of rice.

2.  Saute vegetables in a little bit of olive oil.  I used whatever I had in the fridge and pantry.  In this version I chopped up some carrots and celery, opened a can of mushrooms and water chestnuts and threw in some frozen onion and green pepper.

3.  When the vegetables are soft, add in some seasoning.  We used Worcestershire sauce.  The soy sauce I had purchased contained wheat (big bummer!) so we didn't use that. 

4.  Next assemble!  I used left over steak and heated it in the microwave.  Then added the rice, veggies and meat to the bowl, topped with some sesame seeds and viola ... dinner!

Like I said - quick, easy and good!  Put whatever you like in there to make it with your own flavor!

Enjoy!

Steak Stir Fry
2 cups cooked rice (follow directions on package.  I used minute brown rice)
~5 mini carrots chopped
1 small can mushrooms
2 celery ribs chopped
1/2 green pepper chopped
1/2 small onion chopped
1 small can water chestnuts
1-2 tsp Worcestershire sauce
Steak (or whatever meat you have on hand!)
Handful of sesame seeds

1.  Make rice
2.  Sautee vegetables in a little bit of olive oil
3.  Cook steak, or reheat if using left overs like I did!
4.  Add Worcestershire sauce to vegetables. 
5.  Assemble!  Rice, veggies, meat.
6.  Top with sesame seeds


Wednesday, August 21, 2013

Raspberry Oatmeal Bars

Over 6 years ago I started teaching middle school science.  I accepted this new position to be closer to my then fiance, now husband, but was very nervous about teaching middle school-ers.  I had only taught high school science before that, so I was nervous how middle school kids would react to me.  Truth be told - after six years, I loved it!  While I will always have a fondness for high school students and the connections you build over four years, I have a soft spot for middle school now.   Being able to try new things, having them still think my jokes are somewhat funny, and helping them deal with the problems associated with growing up, are things I really enjoy. 

Every once in awhile a connection you make with a student sticks with you for a long time.  I was lucky enough to meet Whitley over 6 years ago when I started teaching middle school and she was one of my high school cheerleaders.  I've seen her grow from a young lady nervous to leave home to a confident young woman taking on the world at a University.  She's kind and patient (great qualities for a future teacher!) and genuinely cares about other people.  I can't wait to see what she's up to next!

Today she is coming to visit us and have dinner!  Since we moved she only lives about 20 minutes away and I want her to feel like she has a place she can go to when college just seems like too much.  I know I went home very frequently during college and not being able to all of the time would be hard.


To celebrate her coming for dinner, I made raspberry oatmeal bars!  Chewy, sweet, and crumbly these bars are great!  I am a big fan of raspberry and lemon and that combination in this dessert is a home-run!  I'm sure other jams would be great in this also.  These WILL be put in our dessert rotation! Plus they don't use very many ingredients.  Bonus!


To start, melt a stick of butter and stir in 1 tsp. vanilla. 


Then mix together your dry ingredients.  Flour, sugar, baking powder, xanthum gum, oats, salt and lemon zest.  I used a zester and took a couple swipes at the lemon.  I've been doing a little research about the xanthum gum.  It seems as though it's main job is to be a binder in dishes that don't use wheat flour.  I think if you used wheat flour in this instead of oat flour, you wouldn't need the xanthum gum.  Just a thought!

Stir in the melted butter mixture until the dough is crumbly.


Then press 1 cup of the mixture onto the bottom of an 8x8 inch glass pan that has been greased.  I used a cooking spray.


Now for the delicious raspberry filling.  Stir raspberry jam and 1 tsp. vanilla together.

Then spread the yummy goodness on top of the crust.


Top with the rest of the dough mixture and bake at 375 degrees for 20-25 minutes, or until the top is slightly brown.


These are fantastic!  I haven't been able to find a lot of recipes that are easy to make like this - but this one is!  Easy, quick and delicious.  You can't go wrong!


Raspberry Oatmeal Bars
As seen on the back of the Bob's Red Mill oat flour package

1/2 cup vegan butter melted
2 tsp. vanilla - divided
1 cup Oat flour
1 cup oats
1/2 cup sugar
1 1/2 tsp xanthan gum
1 tsp baking powder
1 tsp lemon zest
1/2 tsp sea salt
2/3 cup raspberry jam

1.  Preheat oven to 375 degrees 
2.  Grease an 8x8 inch glass dish
3.  Melt butter and stir in 1 tsp. vanilla 
4.  Mix together flour, oats, sugar, xanthan gum, baking powder and lemon zest in a medium sized bowl.
5.  Add melted butter mixture and stir.  Dough will be crumbly.
6.  Press 1 cup dough onto bottom of glass pan.
7.  Mix raspberry jam and 1 tsp. vanilla together in small bowl.
8.  Spread evenly over dough.
9.  Sprinkle remaining dough on top of jam mixture.  
10.  Bake for 20-25 minutes or until top is slightly brown.

Enjoy!!! 


*** Side note.  The next time I make this I would double the amount of jelly mixture in the center.  That would make this even juicer!


Friday, August 16, 2013

The Best Homemade Granola Bars

Happy Friday Everybody!


 We are enjoying our Friday playing "lots and lots," and taking a walk to the park.  This weekend we get to enjoy the Iowa State Fair.  Last year was my first year attending and we are looking forward to heading back this year.  Our food choices will be a little more limited this year (I'll miss you Tom Tom donuts) but I'm sure we will have a great time!  Our little 3 year old princess also gets fitted for her dance attire tomorrow.  Can you imagine how cute she'll be in her dance leotard, tights and shoes?!?!  I think I might be more excited than she is!

We also celebrated baby boys 6 month birthday yesterday!  6 months old I can hardly believe it!  He's getting into everything now.  So much scooting and inch-worming along.  He loves to watch his big sister play and eats big boy baby food now.  He's such a happy little guy!


Now onto the good stuff.  I would venture to say these are the Best Homemade Granola Bars you will EVER MAKE!  I know that is a big statement - but these are AMAZING!  Plus, they can be customized however you like them.  We enjoy ours 'free life' style, but many people I have shared the recipe with make it using 'regular' ingredients.  Whatever you decide to do .... JUST MAKE THEM!  You won't be sorry - I promise!


Healthier than boxed granola bars, these yummy, gooey treats are filling and just down right delicious.  They taste like you are eating a dessert.  Plus, they do not have a ton of ingredients in them!  Have I convinced you yet?  Try them!


Start by mixing up your dry ingredients; oats, flour, baking soda and brown sugar.  I used oat flour, but you could use regular flour and they will taste just as good!

Then add the liquids; honey, melted vegan butter (but you could use margarine or regular butter) and vanilla.


Then mix it up!

Here's where you get to be a little creative.  We like ours with chocolate chips (vegan-style) but you could use whatever you like!  My mom and dad enjoy add dried cranberries and almond slivers to theirs.  Other types of nuts would be great too.  Or white chocolate chips and cranberries.  Or marshmallows.  Oh the possibilities are endless!

It helps if you have a helper who likes to add the chocolate chips too! She started off all nice and cute using a measuring spoon .....

But then decided dumping was much more fun!


Bake at 325 degrees for 20 minutes, let cool and enjoy!  I store mine in the refrigerator to keep them hard, but they don't last long!


The Best Homemade Granola Bars
Based on the granola bars found at the co-op in the Iowa City area

 
2 1/4 cups oats
1/2 cup oat flour (or regular flour, you pick!)
1/2 teaspoon baking soda
1/2 teaspoon vanilla
1/3 cup vegan butter, melted (you can use regular butter or margarine too!)
1/2 cup honey
2 tablespoons + 2 teaspoons brown sugar
A few handfuls vegan chocolate chips ~ optional

1.  Mix all of your dry ingredients together (oats, flour, baking soda, sugar)
2.  Melt butter
3.  Add wet ingredients (vanilla, butter, honey) to dry ingredients.
4.  Mix well
5.  Add whatever toppings you like.  I used vegan chocolate chips
6.  Grease an 8x8 glass dish and press bars into pan. (I've only ever used a glass dish and it works great!)
7.  Bake at 325 degrees for 20 minutes

Enjoy!


Have a great weekend!


Saturday, August 10, 2013

Smokey Lemon Grilled Chicken

What says summertime better than firing up the grill, watermelon, green beans and a tropical fruity drink.  This recipe encompasses the flavors and tastes of summertime!  Lemon, watermelon, grilled chicken - yum!


To start this wonderful concoction of summertime you'll need to marinade your chicken.  I used frozen chicken breast and thawed them in the microwave for 10 minutes or so.  While the chicken was working, I made the marinade.  This could not be easier!

Zest one of the lemons and add the juice of both to a small bowl. 

Next add your spices!  1 teaspoon each cumin and oregano, a dash of salt and pepper and a half cup olive oil.

Whisk together and it is done!  See, couldn't be easier!

Put your thawed chicken in a dish and poke it with a fork.  I did this to try and get the marinade into all parts of the chicken.  I'm not a fan of just having the flavor of the marinade on the skin.  I like the whole bird to have some flava'.


Next pour the marinade over top, cover and pop in the refrigerator until you are ready to grill.  I let mine sit for about 2 hours.


The hubby grilled the chicken until it was no longer pink on the inside.  We served it with watermelon and green beans.  The smokey flavor of the cumin and the brightness of the lemon combined perfectly!  The chicken was moist and flavorful.  The watermelon and green beans were great compliments!  Corn on the cob would be FANTASTIC with this, but since we are corn free - we skipped that.  I miss corn on the cob more than I thought I would, but it isn't fair to eat it in front of the little lady, and you can't quite shame eat corn on the cob in the pantry very well. Although it might be worth a shot!

Smokey Lemon Grilled Chicken
modified from:  www.rachealraymag.com

Zest of 1 lemon
Juice of 2 lemons ( about 6 tablespoons)
1 teaspoon oregano flakes
1 teaspoon cumin
1/2 cup olive oil
Salt and Pepper
1 chicken breast

1.  Zest 1 lemon into a small bowl.
2.  Add juice of 2 lemons, oregano, cumin, olive oil, salt and pepper.
3.  Whisk to combine.
4.  Pour over thawed chicken and let set for 2 or more hours.
5.  Grill and enjoy!